Rainbow in a Bag – No Mess Art
My kids love making rainbows and it’s even better in their eyes if said rainbow making includes a sensory aspect which usually requires me to clean a bunch of mess after their fun. This week I got one up on the mess and went with a rainbow in a bag that is MESS FREE!!
Heads up: this post may include affiliate links. If you make a purchase, I may earn a small commission at no extra cost to you. Learn more in my disclosure.
I’m smiling, oh, we’re smiling.
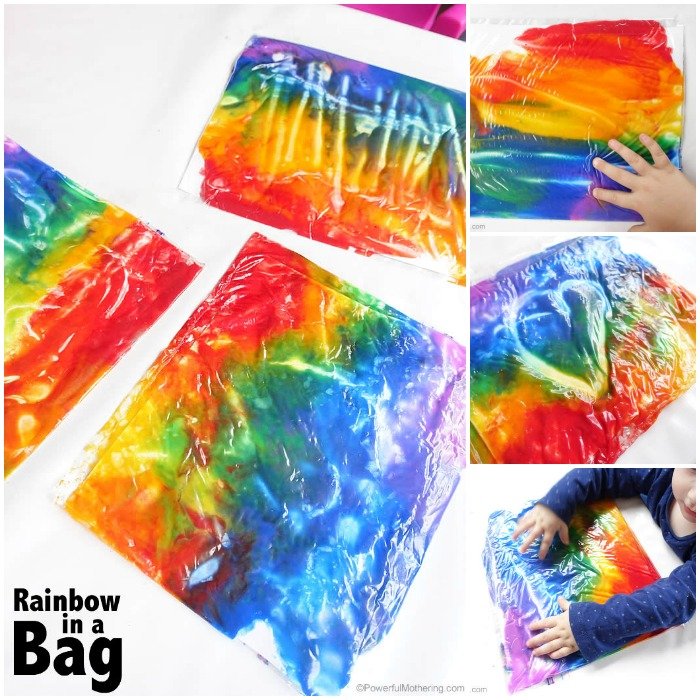
Rainbow in a Bag!
I had a bit of a problem with my paint collection as I didn’t have all the rainbow color paints for this activity! But i’m resourceful and since I have food coloring in the right colors, I went ahead and made my own batch of paint.
The recipe is very similar to my Homemade Finger Paint Recipe except it is a small amount. So if you need more than 4 bags of rainbows, I suggest you make that recipe.
How To Make It
Gather your ingredients:
-
- 1 cup flour
- 2 cups water
- tablespoon of salt
Whisk all these ingredients in a pot and then add to a low heat on the stove. Continue slowly whisking until a smooth substance starts to form. It is between the mix being watery and solid.
Scoop a heaped tablespoon of the mix into 7 bowls to make rainbow colors. Use your food coloring in each bowl to get the desired color. I have used these water colors to get my results. More coloring = more vivid results. I have 20+ drops in each.
Other supplies you will need for this activity:
-
- Large resealable plastic zip bags
- cardstock
- tape / painters tape
Trim your cardstock to fit into your plastic zip bag. You will be folding the top of the bag over so make sure that the cardstock fits the width. Add a heaped teaspoon of paint into the zip bag by holding the plastic away so you don’t mess on it. See the image below.
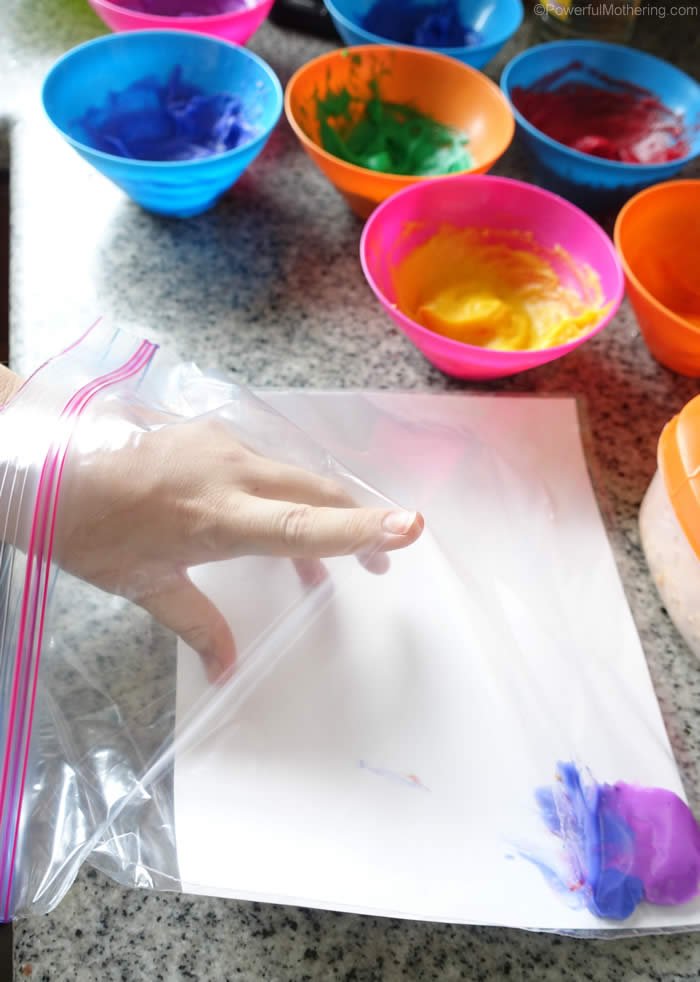
Press down on the plastic to help the paint off the teaspoon.
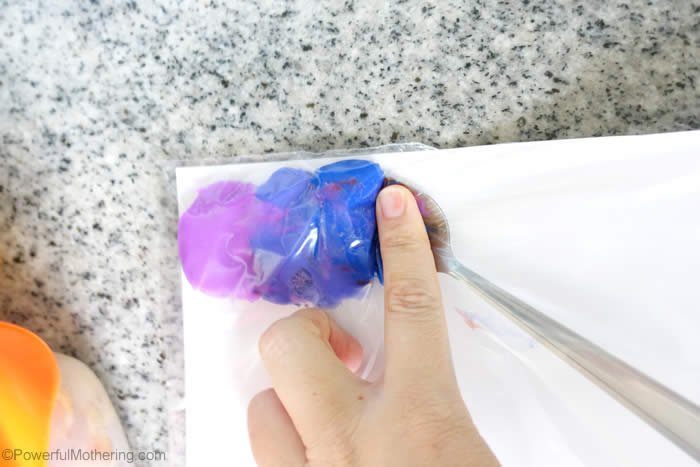
Once you have all your colors lined up close the seal on the bag and fold over the extra bag space.

Tape down the plastic bag’s seal with either clear tape, painters tape or anything you have that will easily remove yet keep your zip bag in place.
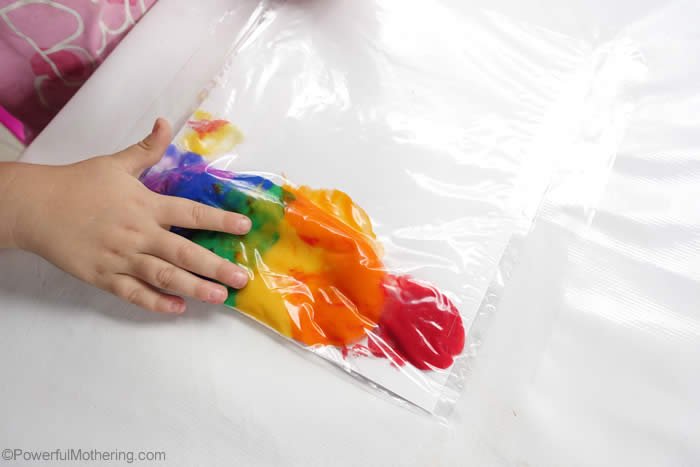
Time To Play
Ask your child if they would like to create a rainbow! They will start pushing the paint across the canvass bit by bit to create their rainbows.

Some of the colors will mix but that is ok; it still looks stunning and regardless, it’s a ton of mess-free fun!

Even my 15-month-old had a go at a rainbow bag. I had a hard time taking a picture of her; she was very enthusiastic about it.
BUT! I did manage to get a little video. Watch it below.
Once you have a rainbow all over your page, the kids are now able to make drawings and patterns!
Use fingers or even earbuds to create pictures, shapes, letters, or numbers in the paint.
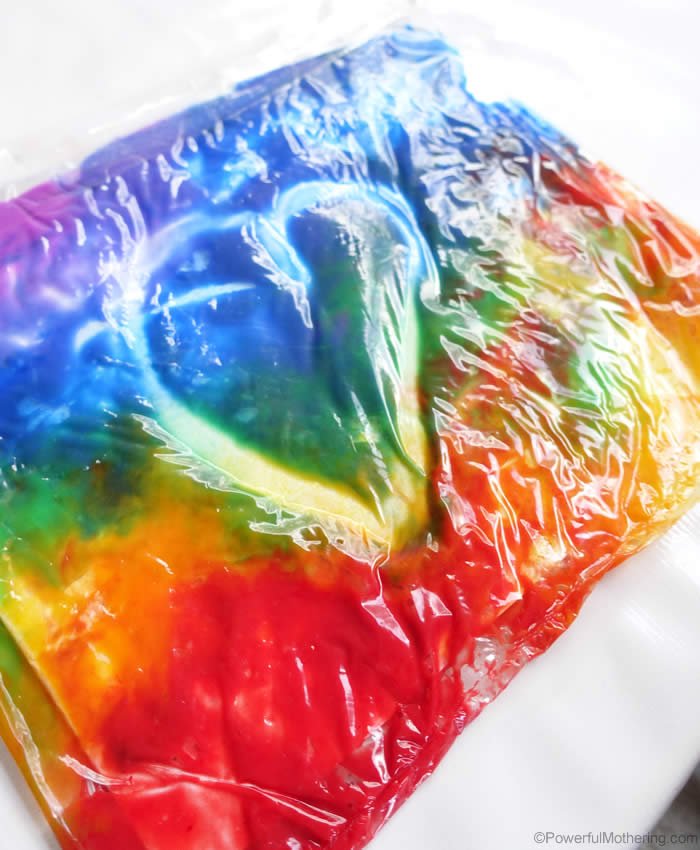
Or just have fun making random squiggles.
A great idea since this is a contained item is to leave it on the table for the day. The kids will come back time after time to doodle on it.

I hope your children have as much fun as mine did with this rainbow in a bag!
Keep the Fun Going! Looking for more hands-on activities to spark creativity and learning? Explore our collection of easy, low-prep ideas for sensory play, arts & crafts, and more! 📌 Discover More Activities Here & don’t forget to join our community for free printables, fun activities, and exclusive learning tips sent straight to your inbox!
If you enjoyed this, be sure to explore our other printables and activities and follow our social media for more delightful learning experiences.