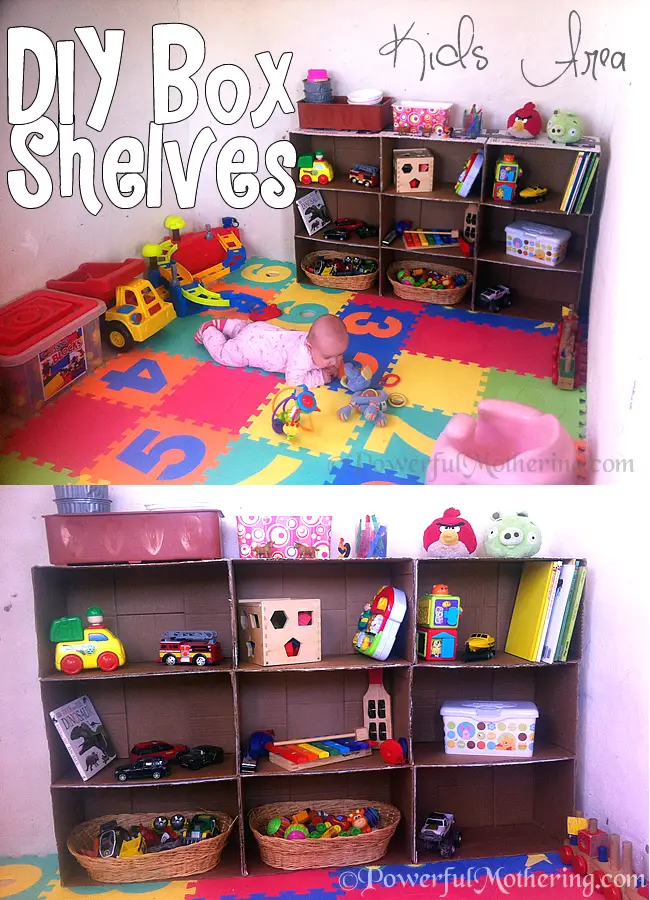
Making A Shelf Out Of Cardboard Boxes
I woke up this morning with a “bee in my bonnet,” so much so that I decided to attack the storage room. You know that room where all the various boxes seem to pile up, and then you forget to put them out with the trash?
Heads up: this post may include affiliate links. If you make a purchase, I may earn a small commission at no extra cost to you. Learn more in my disclosure.
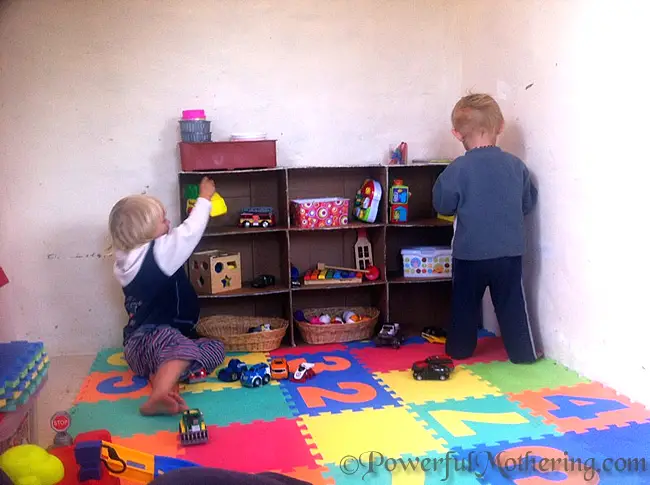
While merrily flattening the boxes, I realized I had a few that were the same size, and crafty inspiration struck!. Let’s change that silly nook around the corner into a play nook and use the boxes as shelves! Yay!
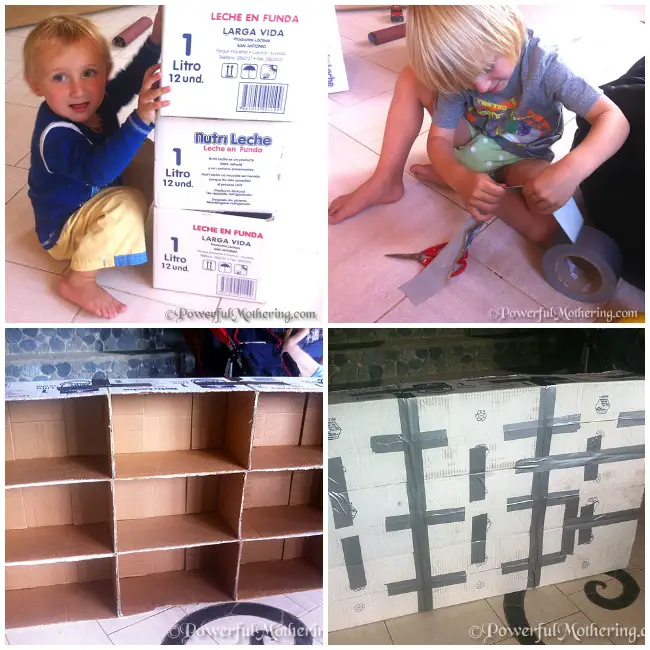
Putting the boxes aside, I had a look around Google; there was nothing much to get excited about. I saw almost no pins in Pinterest, so I just grabbed my scissors and duct tape (yes, duct tape) and started.
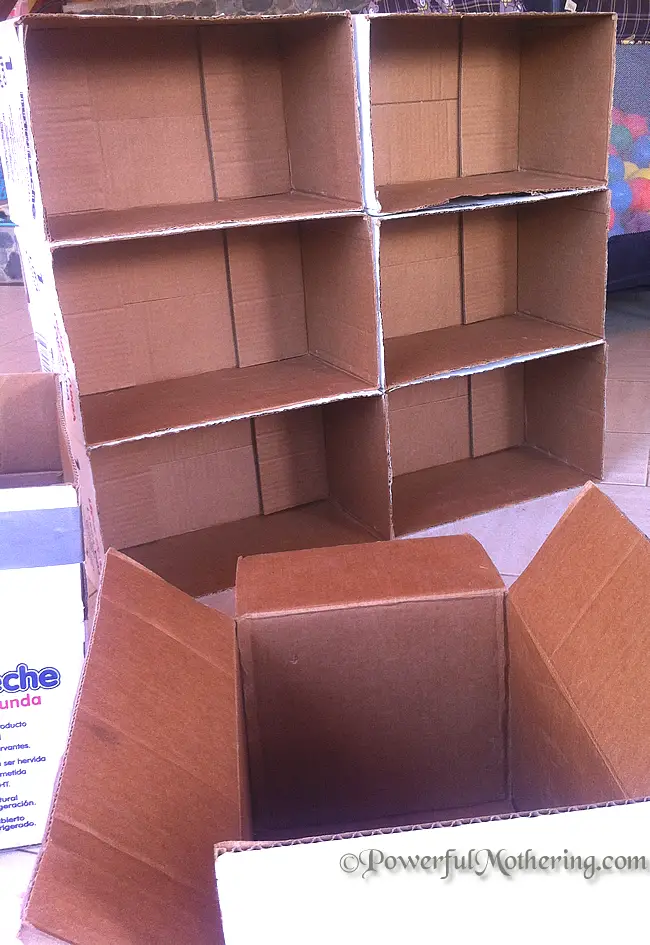
Most of the pictures in my search had the lids cut off; bending them inward looked weird, and so did bending them backwards, so off they went. I had various helpers, from my 2-year-old stacking the boxes to my 3-year-old wanting to help cut the duct tape, and my almost 5-month-old happily “supervising” everyone.
Here are the steps to make your own DIY cardboard box shelves:
- Gather your materials: boxes, scissors, and duct tape.
- Cut the lids off of the boxes
- Style your boxes
- Tape a row at a time
- Then tape the entire thing together
- Paint it
- Add toys
Now I didn’t paint mine. I was heading outside with my spray can when it started raining.
But after putting toys in to test it out, I decided since it’s kind of in a corner, I don’t think I’ll even paint it for now.
I might add some more boxes later on and then get some different color paints, like red, blue, yellow, and purple, and do all different things.
All in all, I’m very happy with my shelf I didn’t have to pay a cent for!